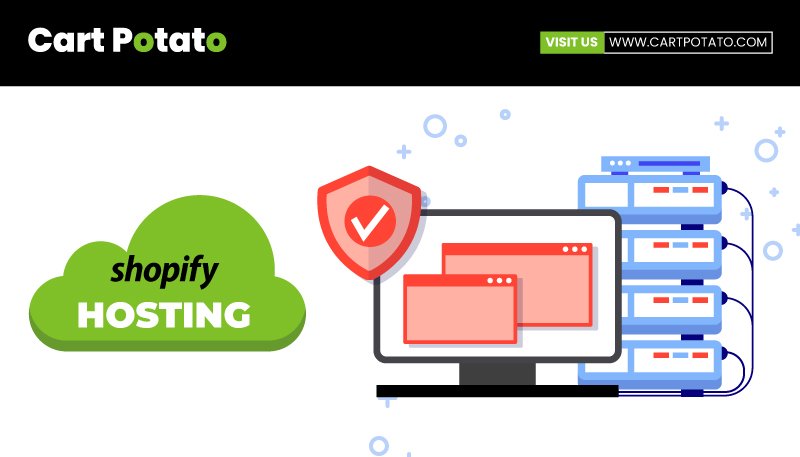
Optimize, Migrate, Succeed: Shopify Hosting Magic
In the realm of ecommerce, not all hosting providers are cut out for the unique demands of online businesses. If you find yourself grappling with escalating costs, performance issues, or simply lack the time to stay abreast of security patches and upgrades, it might be the opportune moment to consider a seamless transition.
Cart Potato proudly stands as an exclusive agency specializing in Shopify and Shopify Plus solutions, dedicated to empowering businesses with cutting-edge ecommerce capabilities.
Why Shopify?
The ecommerce landscape can be challenging, and Shopify emerges as a game-changer for those seeking a comprehensive solution.
More than just a hosting platform, Shopify comes equipped with a plethora of tools, add-ons, and capabilities designed to save time and elevate the online presence of business owners.
Shopify’s distinction lies in its singular focus on ecommerce, purpose-built to cater to the unique needs of online stores.
Recognizing the critical impact of website performance on revenue, Shopify understands that every millisecond matters.
If you’re contemplating a shift to a fast, reliable platform that not only addresses your current challenges but also positions your business for future success, Shopify is the answer.
In this blog post, we will guide you through a step-by-step process on how to seamlessly transfer your web hosting to the Shopify platform, unlocking a world of possibilities for your ecommerce venture.
If you’re ready to make a move, read on for step-by-step instructions on how to transfer your web hosting to the Shopify platform.
Step 1: Secure New Hosting for Your Shopify Venture
Initiating your transition to Shopify begins with selecting the optimal Shopify solution for your business. To ensure uninterrupted operations and a seamless customer experience, the goal is to have Shopify up and running while your existing website remains active.
Shopify offers a plethora of native capabilities right out of the box, allowing for easy configuration and customization to suit your specific ecommerce needs.
The platform’s flexibility provides choices such as utilizing the full platform, opting for a headless build, or selectively integrating components.
This versatility empowers you to pick the tools that best complement your stack without being constrained by specific capabilities or architectural designs.
Once you’ve enrolled in Shopify, the next step involves revisiting your current website.
Step 2: Extract Crucial Datasets from Your Current Platform
Thoroughly assess and document your website data, ensuring a tailored transition to Shopify. Examples of transferable data may include:
– Products
– Customers
– Historical orders (fulfilled orders)
– Gift cards
– Certificates
– Store credits
– Discount codes
– Blogs
– Pages (shipping policy, contact, and other webpages)
– Product reviews
Prepare these datasets in a CSV file, as Shopify utilizes CSV files for product imports. Familiarize yourself with Shopify’s guidelines for downloading and formatting your CSV file. Additionally, review instructions on opening and editing CSV files for a seamless transition.
For promotions currently active on your ecommerce website, document details such as discounts or free shipping. Note down rules, expiration dates, availability conditions, channels, and more. Decide which promotions to directly transfer to Shopify and plan accordingly for any modifications, discontinuations, or notifications to customers post-website launch.
Step 3: Strategize Your Storefront and Opt for a Theme
Once your data is primed for migration, the next crucial step is to meticulously plan your new storefront and choose the Shopify theme that aligns seamlessly with your business goals.
This phase is also an opportune time to explore ways to overcome any limitations posed by your previous hosting solution, with Shopify’s team readily available to guide you through this pivotal stage of migration.
There are two primary methods for constructing an online storefront on Shopify:
1. Integrated, Headed Storefront:
Opting for a headed approach entails maintaining a tightly integrated front end (customer-facing elements like images, menus, links, and text) and back end (invisible components such as the inventory database). With Shopify’s headed solution, back-end tools seamlessly integrate into the front end, providing a user-friendly and scalable approach to building and managing a fully hosted store.
2. Headless Storefront:
The headless approach offers enhanced flexibility but requires additional maintenance and support, particularly from technical teams. In a headless storefront, the front end and back end of an ecommerce website operate independently, providing flexibility in architecture. There are three primary methods for setting up a headless storefront on Shopify:
- Storefront API:
Design and host your front end, utilizing Shopify’s GraphQL Storefront API for building custom headless storefront applications. APIs enable communication with Shopify through various web development languages and frameworks.
- Storefront API + Hydrogen React:
Leverage Shopify’s Hydrogen React framework, powered by the Storefront API, to construct your front end. This framework offers fundamental components required for ecommerce store development while maintaining architectural flexibility.
- Host a Hydrogen Front End on Shopify Oxygen:
Alternatively, you can host your front end with Shopify by using Hydrogen Reach. This approach utilizes Shopify’s hosting architecture, Oxygen, optimized for headless ecommerce.
Step 4: Strategize Your Approach to Plugins, Add-ons, and Integrations
Once you’ve identified and gathered all the data earmarked for transfer to Shopify, the next crucial step is to ensure that your new website is equipped with the requisite functionality. It’s imperative to establish integrations with existing systems and tools before the launch of your new website.
Evaluate Current Functionality and Plan for Enhancements
To guarantee that your new website meets all your operational needs, take the time to outline the plugins, add-ons, and integrations essential for your Shopify website. Thoroughly assess your existing website’s functionality, gaining a comprehensive understanding of your requirements. This phase also provides an opportunity to introduce new features and capabilities. Explore Shopify’s business tools and the app store to discover ways to enhance and extend your website’s functionality.
Define Requirements for Integrations
Your ecommerce website likely integrates with external tools that facilitate business management. Ensure that your new Shopify site maintains these integrations and consider adding new ones to elevate your business further. Shopify offers diverse options for website integrations, including:
1. Prebuilt Integrations:
Explore the Shopify App Store for vendor-built apps seamlessly integrated with Shopify.
2. Custom Integrations:
Develop an integration using available Shopify APIs (REST, GraphQL) or webhooks.
3. Integration Partners:
Utilize Integration Partners like Celigo or VL OMNI.
4. Integration Platforms (iPaaS):
Explore platforms such as Boomi, Jitterbit, or Mulesoft.
Many websites employ multiple integration methods with various providers. Allocate ample time to implement and thoroughly test all required integrations before finalizing the transfer process. If you have any inquiries or need assistance with integrating your new Shopify website, feel free to reach out to Shopify Support for guidance.
Step 5: Execute Database and File Import to Your New Store
With all your files securely downloaded and your new store equipped with the necessary add-ons and integrations, the next phase involves initiating the import of your data.
Upon completing the import, allocate time to meticulously verify that all data has transitioned accurately. Scrutinize each product detail to ensure that product descriptions, images, variants, and meta descriptions are all accurate and aligned.
Consider creating product collections if you haven’t already, organizing your products into categories for easier customer navigation. Adding collections to drop-down menus and creating links to collections on your storefront can enhance the overall user experience.
Step 6: Fine-Tune SEO Optimization for Your Fresh Shopify Website
When transitioning your hosting to Shopify, your new website operates on a platform meticulously designed with SEO principles in mind. Shopify’s platform facilitates SEO optimization through clear naming patterns, automatic generation of tags and sitemaps, and more.
However, to ensure optimal organic discovery of your products online, additional steps are crucial. After importing your data and configuring functionality, allocate time to focus on SEO optimization during the web hosting transfer process. Before launching your website, thoroughly review the following aspects:
1. Review New URL Structure and Set Up Redirects:
Shopify provides a new website URL structure with standard SEO optimization. Create a list of all current site URLs and prioritize them based on their existing value to your SEO traffic and strategy. If the URL on your new Shopify site differs, set up corresponding redirect URLs. Craft a URL structure that incorporates desired keywords, adhering to best practices with one-to-one redirects using 301 permanent redirect logic.
2. Update Meta Titles and Meta Descriptions:
Craft meta titles and meta descriptions that are informative, descriptive, and easily comprehensible, encouraging customers to click through from search engine results. Ensure these elements contain your target keywords for enhanced SEO.
3. Optimize Page Speed:
Website loading speed significantly impacts SEO rankings and customer purchase likelihood. Shopify storefronts leverage high-performance cloud-based infrastructure, loading 2.97 times faster than other platforms.
4. Review Sitemaps, Robots.txt, and Structured Data:
Shopify provides features like an automatically generated sitemap.xml file, updated when new pages and images are added. After site launch, resubmit your sitemap.xml file to Google Search Console. Customize your Robots.txt for granular control over site crawling. Review structured data markup for better search engine understanding.
5. Track and Monitor SEO Performance:
Post-launch, monitor SEO performance using tools like Shopify’s SEO apps. Use external tools such as Semrush, Ubersuggest, Ahrefs, and MOZ for keyword research. Track link health and minimize broken links with tools like Xenu’s Link Sleuth and Screaming Frog.
Step 7: Evaluate and Test Your Website Before Launching
Prior to launching your website and making it publicly accessible, it’s crucial to conduct a comprehensive review and testing process. Allocate sufficient time to ensure that every aspect of your new website is functioning seamlessly before the domain transfer and official launch.
1. Configure Reporting and Analytics Application Pixels:
If you utilize reporting, analytics, or retargeting tools, ensure their pixels are appropriately configured on your new Shopify site. Shopify seamlessly integrates with various analytics providers, including:
– Google Analytics 4
– Google Tag Manager
– Meta pixel for marketing campaign analytics
– Google Ads conversion tracking
– Bing Ads conversion tracking
Many of these integrations come with prebuilt configurations when installed via Shopify. They leverage the Shopify Web Pixels API for secure, reliable, and high-performance pixels. After installing the app, go through the setup process to configure a pixel.
2. Configure Custom Pixels:
For tracking and managing custom events, such as link clicks or product additions to the cart, use the Shopify pixels manager. Custom events are integrated into the Shopify store through the pixel manager, typically handled by a developer.
By thoroughly testing and reviewing your website at this stage, you ensure a smooth transition to the live environment and minimize the risk of issues impacting user experience. This meticulous process sets the stage for a successful website launch and contributes to a positive first impression for your customers.
Step 8: Transfer Your Domain Name
Once your website is set up, migrated, optimized, and thoroughly tested, the next crucial step is to transfer your domain name and make your new website live. Keep in mind that the domain transfer process can take up to 20 days, so careful planning is essential. Here’s an overview of the steps to seamlessly transfer your domain to Shopify:
1. Connect Your Domain to Shopify:
To prevent any service interruptions, connect your domain to Shopify before initiating the transfer. Failure to do so may lead to connection errors for visitors during the transfer process. Ensure the connection process is complete before proceeding.
2. Check Domain Eligibility:
Verify your domain’s eligibility for transfer within your new Shopify account. Some domains, such as .ca and .co.uk, may not be eligible. Only apex domains (e.g., johns-apparel.com) can be transferred, not subdomains (e.g., shoes.johns-apparel.com). After transferring the apex domain, you can recreate any subdomains previously in use.
3. Complete the Transfer Process:
Start the domain transfer process from your Shopify account admin panel after preparing your domain. Follow the detailed step-by-step instructions, which may involve communication with multiple providers, obtaining authorization codes, and timely email checks.
4. Confirmation and Post-Transfer:
Upon successful domain transfer, you’ll receive a confirmation email from Shopify. Visit the Domains page in your Shopify account to update settings or configure subdomains. Your new website will be live and accessible with the transferred domain.
Conclusion: Host Your Ecommerce Website with Shopify
In the evolving landscape of ecommerce, relying on purpose-built platforms like Shopify offers numerous benefits compared to traditional web hosting providers. Shopify provides a host of advantages, including a plethora of add-ons, app integrations, and expert support to guide you on various aspects, from inventory management to site-speed optimization.
For a hassle-free and expert-guided transition, consider contacting Cart Potato, your dedicated ecommerce solutions partner. Contact Cart Potato to navigate through the entire process seamlessly, ensuring your online store is optimized for success. Trust Cart Potato for a smooth transition and future-proofing your ecommerce business on the Shopify platform.
FAQs:
Q1: Why should I consider migrating my ecommerce website hosting to Shopify?
A1: Shopify offers a purpose-built platform with tools, add-ons, and capabilities designed for seamless ecommerce operations. Its focus on performance, reliability, and a variety of features makes it a game-changer for online businesses.
Q2: What distinguishes Shopify from traditional web hosting providers for ecommerce?
A2: Unlike generic hosting, Shopify is tailored for ecommerce, providing a comprehensive solution with a range of business tools, high-performance infrastructure, and expert support, ensuring optimal online store management.
Q3: How can Cart Potato assist in the migration process to Shopify?
A3: Cart Potato is an exclusive agency specializing in Shopify and Shopify Plus solutions. They offer expert guidance, support, and solutions for a smooth transition, ensuring your ecommerce venture is empowered with cutting-edge capabilities.
Q4: What are the key steps to transferring web hosting to Shopify?
A4: The process involves securing new hosting, extracting crucial datasets, strategizing storefront and themes, planning for plugins and integrations, executing data imports, fine-tuning SEO optimization, evaluating and testing the website, and finally, transferring the domain name.
Q5: Can I maintain my current domain name when transferring to Shopify?
A5: Yes, Shopify allows you to transfer your existing domain name. The process involves connecting your domain to Shopify, checking eligibility, completing the transfer process, and updating settings post-transfer.
Q6: How can I optimize my SEO during the hosting transfer to Shopify?
A6: Focus on reviewing URL structures, setting up redirects, updating meta titles and descriptions, optimizing page speed, reviewing sitemaps, robots.txt, and structured data, and tracking and monitoring SEO performance using Shopify’s built-in tools and external platforms.
Q7: What role does Shopify’s support play in the hosting transfer process?
A7: Shopify offers extensive support throughout the process, from configuring analytics pixels to assisting with domain transfers. Users can reach out to Shopify Support for guidance and troubleshooting at any stage of the migration.
Q8: Is there a trial period for Shopify, and how do I choose the right pricing package for my business?
A8: Yes, Shopify offers a free trial period. To choose the right pricing package, explore Shopify’s various packages, considering your business needs and budget constraints. Some packages offer a free trial, allowing you to assess compatibility before committing.
Q9: What benefits does a headless storefront approach offer, and how do I decide if it’s right for my business?
A9: A headless approach provides enhanced flexibility but requires additional maintenance. Consider factors like brand identity, current website challenges, technological impact, and long-term support when deciding if a headless approach is suitable for your business.
Q10: How can I ensure a smooth transition and avoid issues during and after the hosting transfer to Shopify?
A10: Thoroughly review and test every aspect of your website before launch. Configure reporting and analytics applications, ensure proper domain connection, and follow Shopify’s guidelines for data import and domain transfer to minimize the risk of issues impacting user experience.


Let’s Move
Forward Faster
You’re Doing the Hard Work. Let’s Make It Pay More.
Schedule a call and optimize your store for ROI.